I made a film called "The prehistoric interview". It was the second film I did on my own. And here it is now:
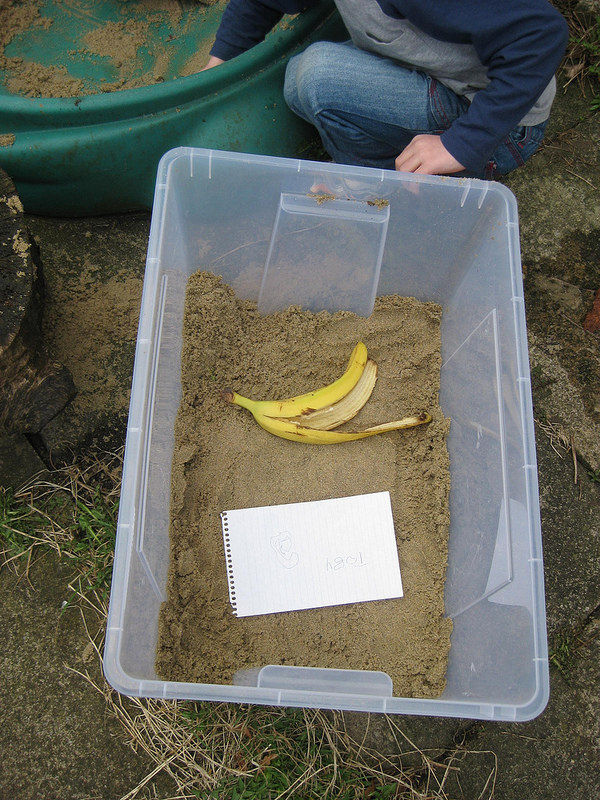
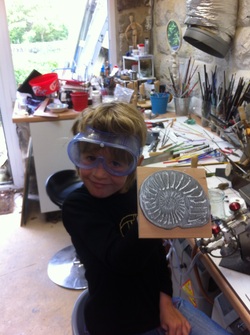 Yesterday, we made an ammonite bowl. We had a big stamp, and we used glue to stamp ammonites onto glass. 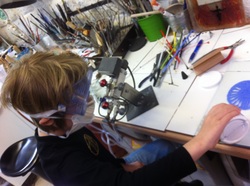 Then we put colours on - the colours were red, black, blue and white, and they were actually glass, too. So we had to be really careful, because you can't breathe it in, it's super dangerous! If you breathe it in, it can really damage your lungs, so I was wearing goggles and a breathing mask, so I was super-safe. (Edit from Mummy: and we washed our skin and changed clothes when we went back in the house!) 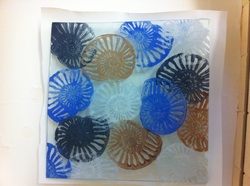 This is what the bowl looked like when it went into the kiln. It didn't come out right, there's a big bubble in the middle, but you can hide a real ammonite underneath it, and so we still like it. We might have another go soon.   Eight weeks ago, we covered up six things to make an archaeological dig. We wrote about it on the blog (you can read about it here). Today, we dug it up. I was really, really excited, I couldn't wait! I had a trowel, and this picture is me going across with my trowel very evenly. 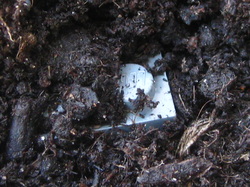 This is a bit of my Lego brick. First we only saw a little bit, and I saw the word Lego on it. We carefully dug across and then when we got it all, we pulled it up, and we put it in our findings tray. 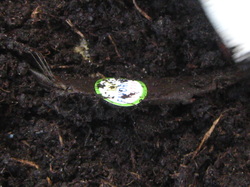 This is a little piece of banana skin, with the sticker on it. If it didn't have the sticker, we probably wouldn't have found it. It rotted away lots, and there were little bugs eating it. It was brown and nearly the same colour as the soil, just a bit darker! 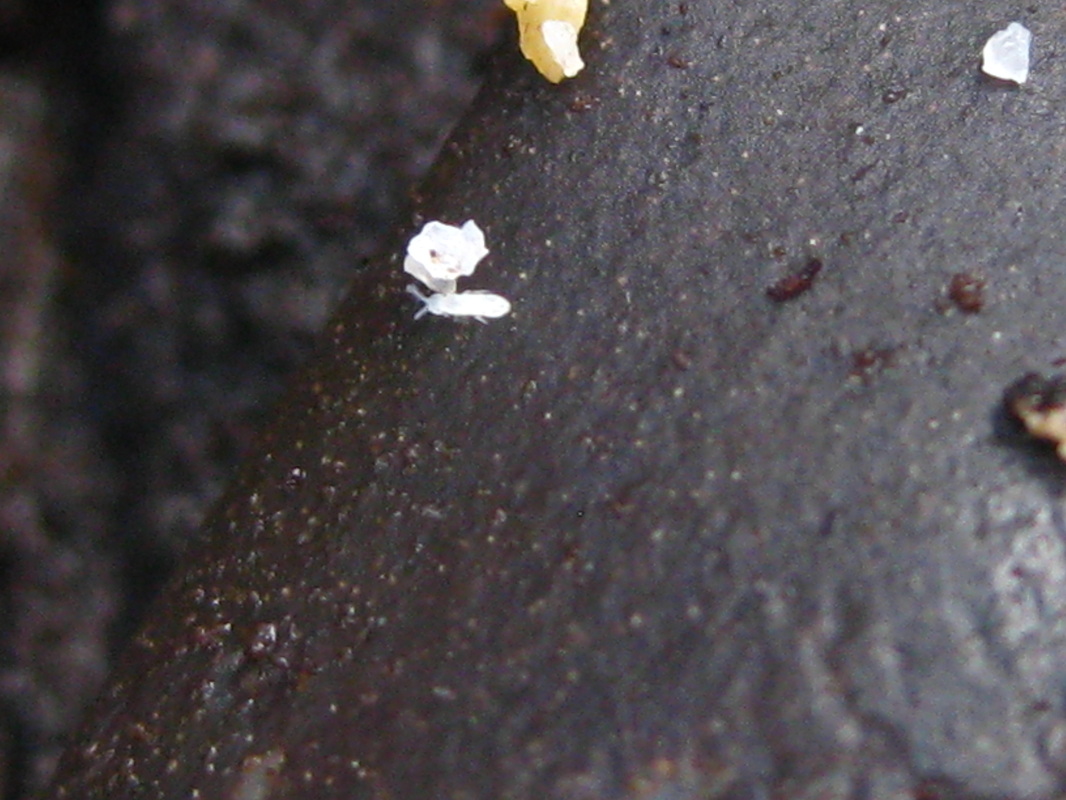
 This is the ammonite we found. It was still the same. 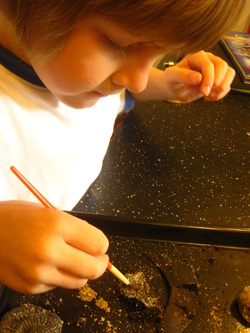 This is me cleaning the banana skin, my best find. It was most, most interesting! And there was another interesting find, and that was the paper - it was gone!!! The coin, the Lego brick and the ammonite stayed the same, because they were inorganic. The banana skin and the hyacinth leaf rotted away lots, and the paper was completely gone. Below are the pictures of the hyacinth leaf and the banana skin. It was super fun to do an archaeological dig - you can do it at home, you just need to print off some sheets of paper, and you have to find things to bury, and you have to do what the paper says, and you have to bury them for eight weeks. We got the idea from the BBC (http://downloads.bbc.co.uk/history/handsonhistory/dig_family.pdf). 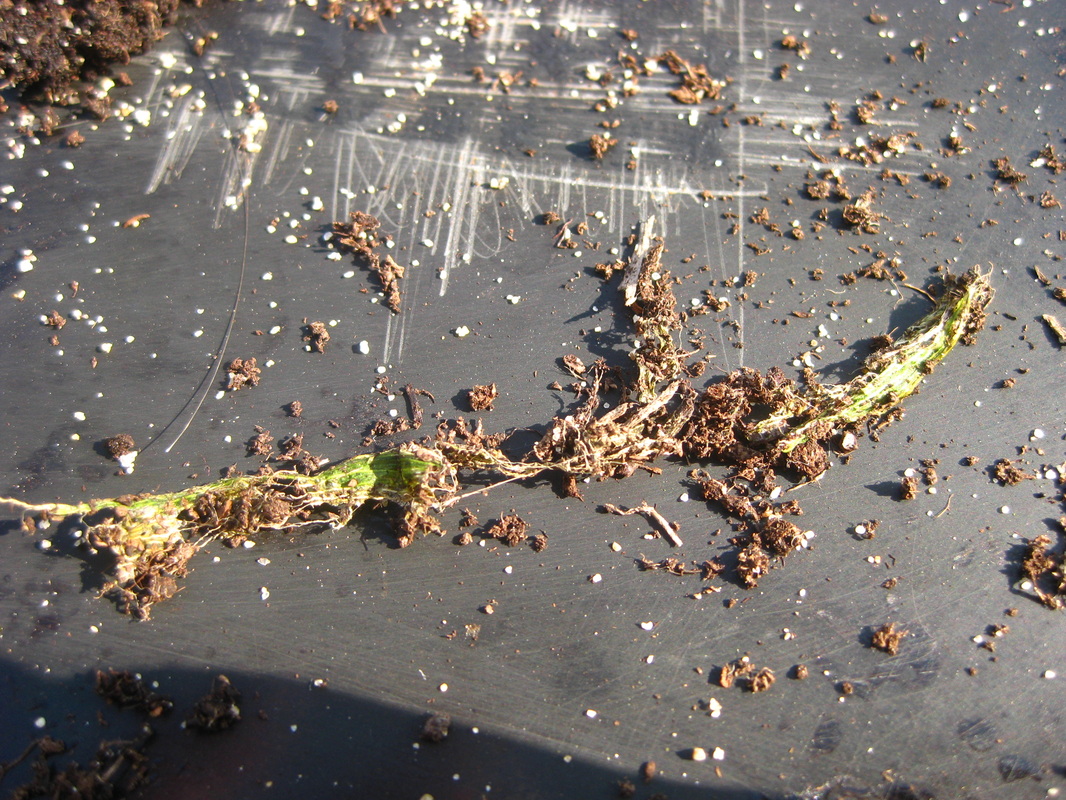

Two days ago, I made a Lego Mary Anning cliff. And the mini figures were Mary Anning and her brother Joseph. There are a few crystals, a dinosaur tooth and an ichthyosaur, and a fossilised fish. Mary Anning has got a hammer and a cloak. We couldn't find a bonnet for her in my lego box. She had a little white dog, but I didn't have a white dog, I only have a grey and black dog, and that was a lot bigger, so we just put a cat in. And Joseph was bigger than Mary Anning, but in my Lego set he's smaller. Maybe when I have more Lego pieces that are grey, I can build it a lot higher and wider cliff, and maybe I'll get figures that fit better for the dog and Joseph. 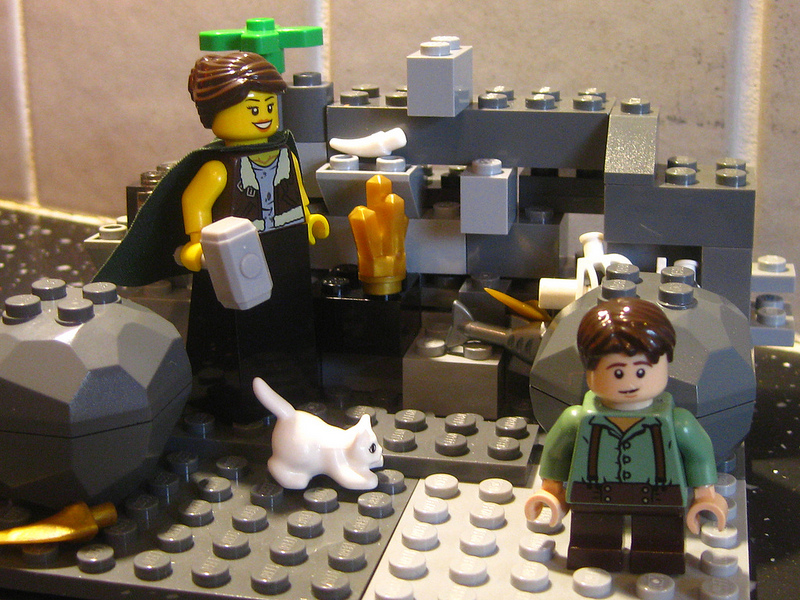
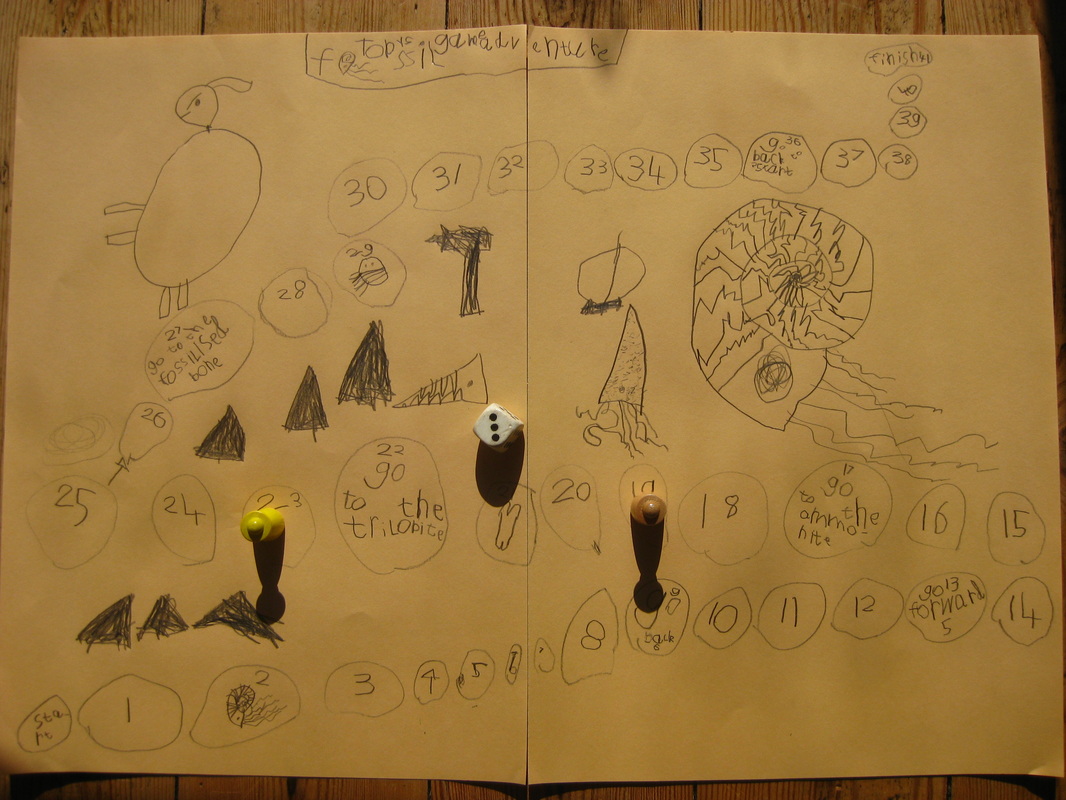
 This is my fossil adventure game. It's bigger than this picture. I drew lots of pictures and circles to walk on, and then I wrote on them. The pictures are of an ammonite, a belemnite, a fossilised leaf, a parasaurolophus, an ichthyosaur head, a trilobite, and some fossilised teeth. 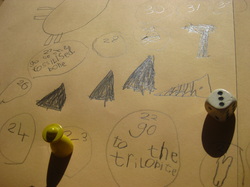 You have to roll the dice and the number it lands on, you have to go that many steps forward. If there's a message in the circle, then you have to do what it says. We played it lots yesterday, and this circle says "go to the trilobite", and there is a circle with a trilobite in it. Maybe you can make your own game at home, it can be any game you want! 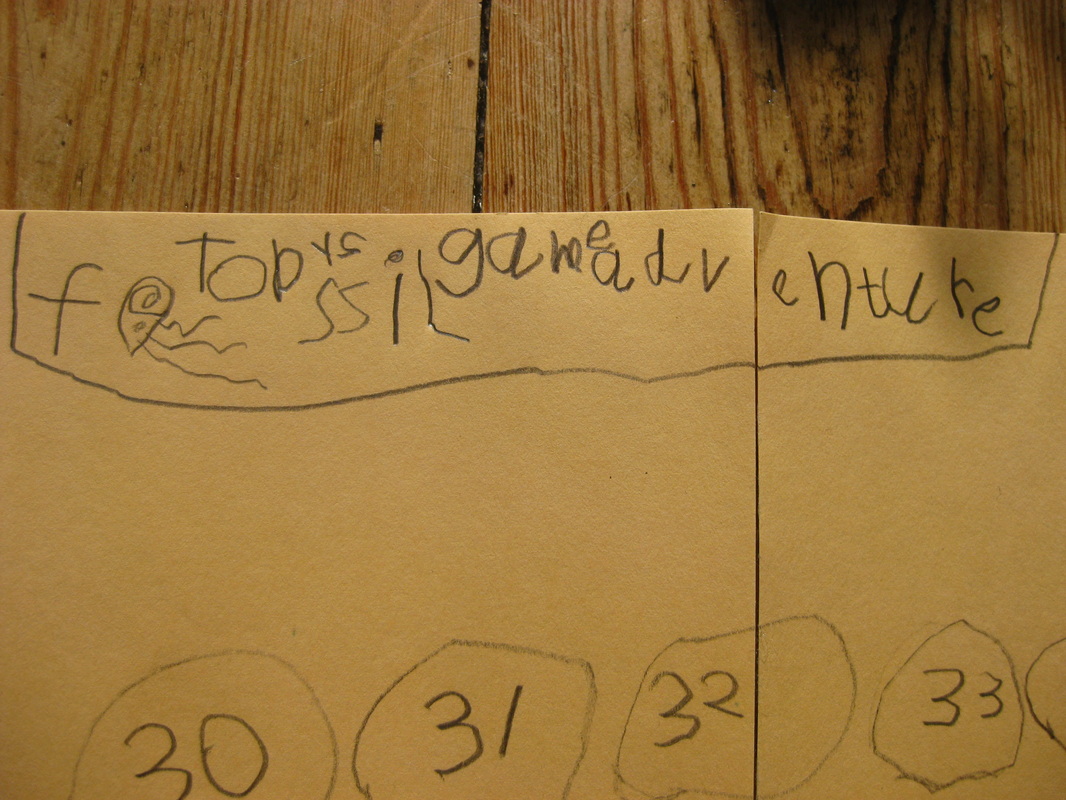
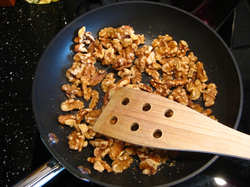 We made some fossil cookies. First, Mummy toasted some walnuts... 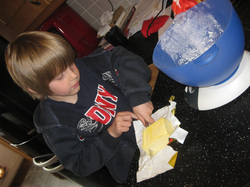 ...and here I'm chopping the butter. 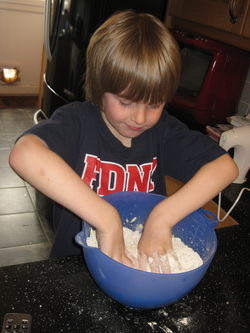 Here I'm squashing the dough together.  Here are all the things that we used. 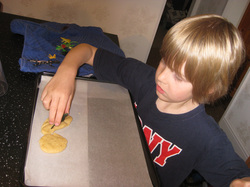 Here I'm pushing a dinosaur into the cookie to make a fossil imprint. 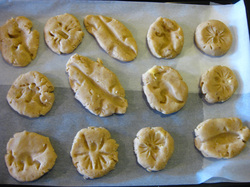 Here are the cookies, what they looked like before they went in the oven...  and here are what they looked like when they came out of the oven. They're very yummy!
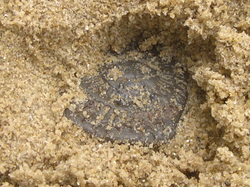
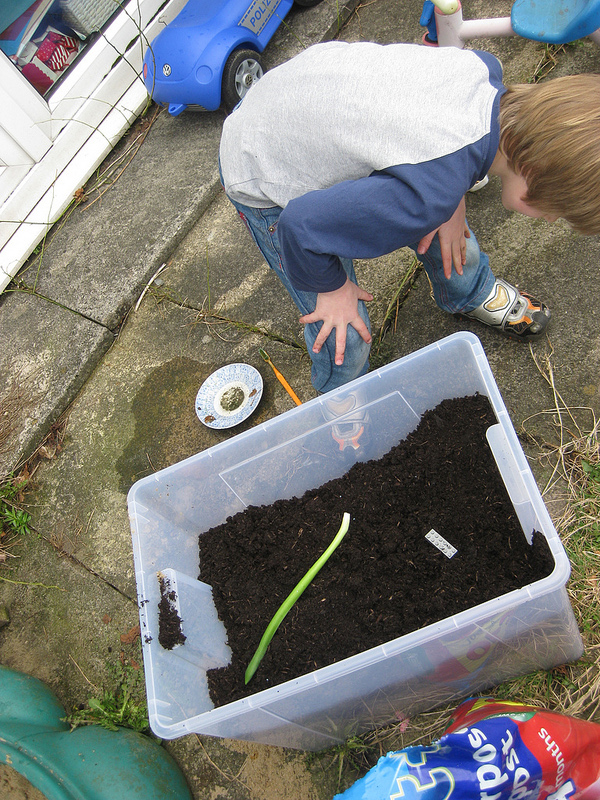
Thank you to Hazel and Verena for showing us the recipe! If you want to make them, here's the recipe: http://www.marthastewart.com/345396/fossil-cookies Trilobite eyes are really cool, and I really like them. I've made a film all about trilobites, and you can watch it if you want, and I hope you like it!  We know this is not a fossil, but it was another type of dig. When Mummy was out walking, she dug the ground to see if she could find anything old. And she found a bottle! We took the shards home, we cleaned them super-carefully, and then we puzzled it back together. That's what palaeontologists do when they find a dinosaur skeleton, so it was good practice. The bottle is about 100 years old!! (Clarification from Mummy: the bottle was half out of the ground!) 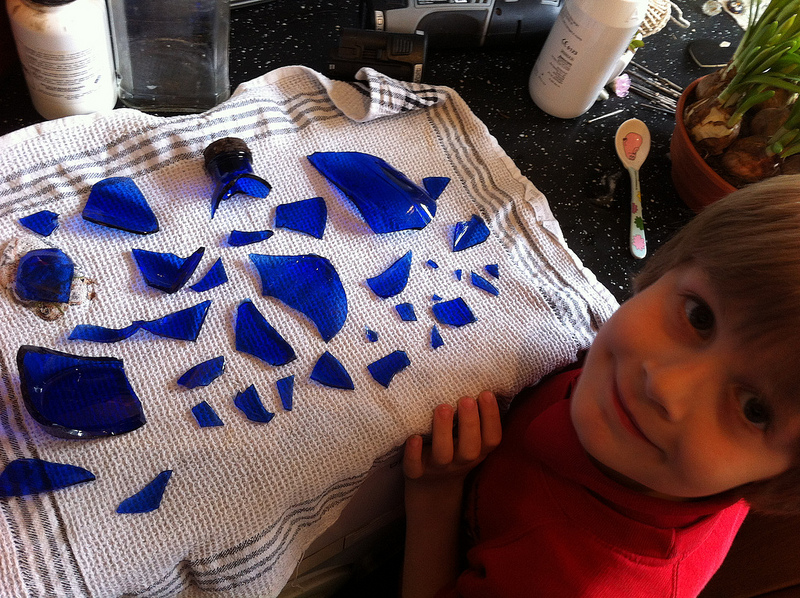 This is what it looked like when we finished it: 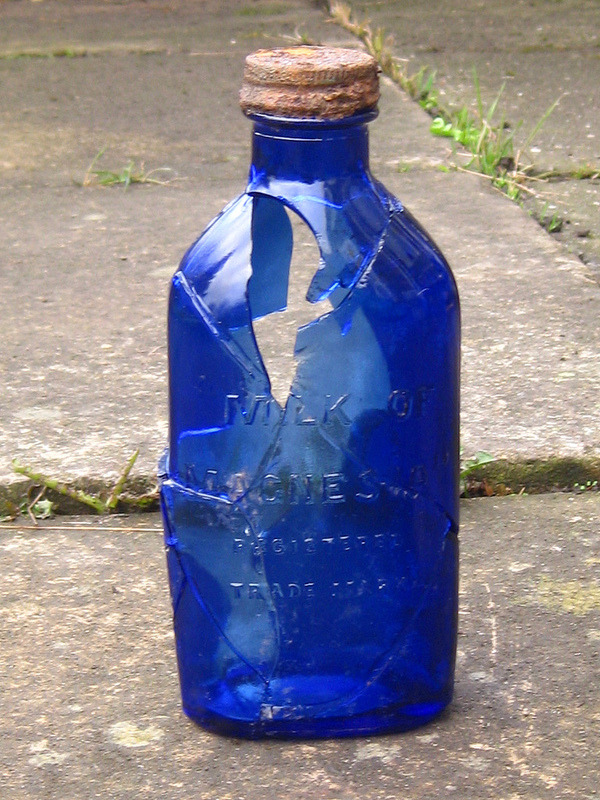  Today, we did an archaeological dig. It might not look like it's for fossils, but it is what palaeontologists sometimes do. Usually, you dig for something that's already there, but we buried things, and then, in 8 weeks, we're going to dig them out and see if they've changed. We buried six things - three of them were organic, and three of them were inorganic. Organic means they were alive, and inorganic means they weren't alive. Our organic things were a banana skin, a hyacinth leaf and a piece of paper (paper is organic, because it's made from trees). Our inorganic things were a fossil, a lego brick and a coin. The fossil was once alive, but now it is stone, so it's inorganic. For each one we had to say what colour it was, draw a picture, measure it, and say what it felt like. And when we dig them up, some of them might have changed, and some of them might have not changed. 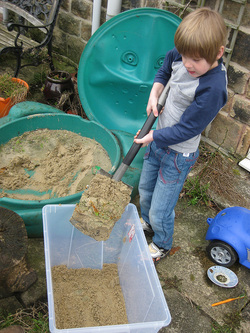 Then we went outside. We put sand in a plastic box, and we made one layer, and we put two things on it. And then we made the next layer, and then we put two things on, and then we made a layer of soil, and we put two things on it, and we put more soil on top.
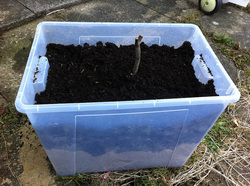 Now it's finished. It's going to stay in our garden for eight weeks, and then we'll tell you if anything's changed. If you want to make your own archaeological dig, you can use the information that we used: http://downloads.bbc.co.uk/history/handsonhistory/dig_family.pdf
 Today I made an ancient rockpool! We went to Castleton and we met Gordon, and he helped me make my rockpool. First I painted it blue and green. Then I stuck down rocks while Mummy made some tubes for the corals. Gordon drew me my two trilobites, and I drew an ammonite and a fish. I stuck some wool in the corals and I put a silver piece in. My rockpool is my best creation ever! 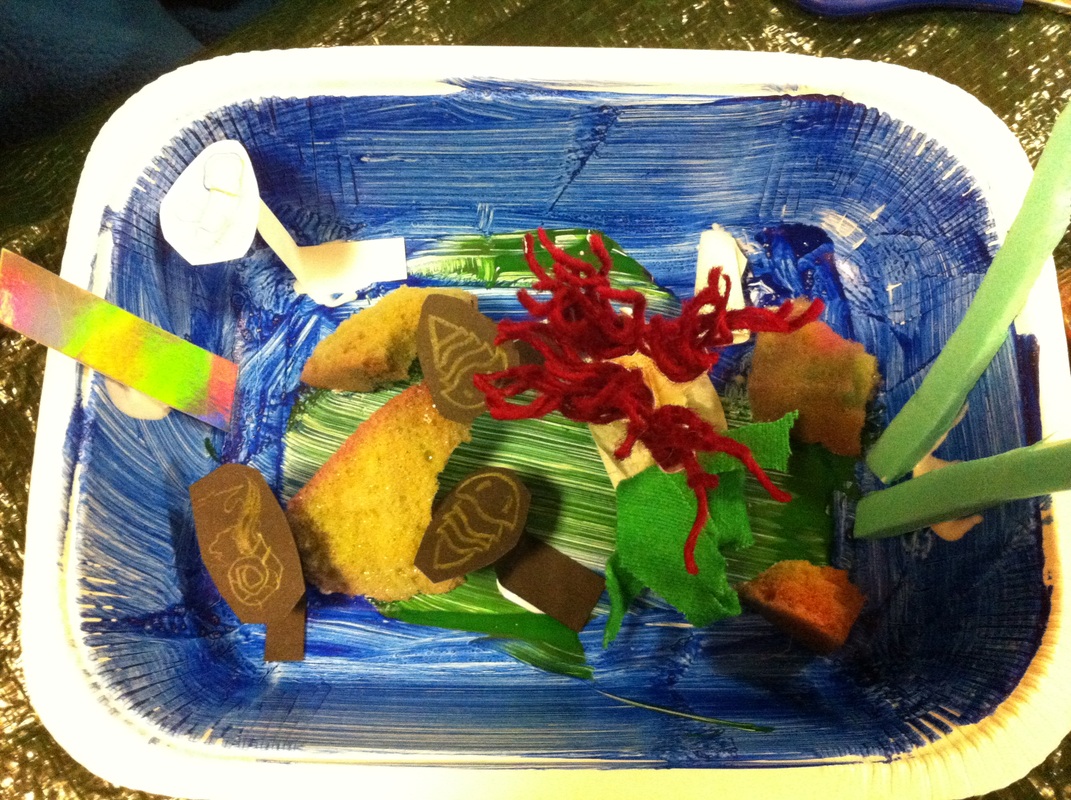
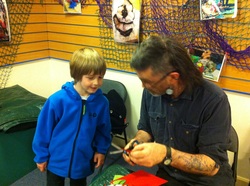 Gordon made me two trilobite puppets. There was a big one and a small one. My best one was the big one, it was three-fingered. There were ammonite toys and belemnite toys, and there were even real fossils there! If you want to, then you can read about the project: http://ancientlandscapes.blogspot.co.uk/ I had a really, really good time! 
|
AuthorHello, my name is Toby. I am five years old, and I want to be a palaeontologist. I really like fossils, so I'm writing down everything I do with fossils! My Mummy is doing the typing until I'm a bit older, but she writes everything I say. Archives
September 2014
Categories
All
|
 RSS Feed
